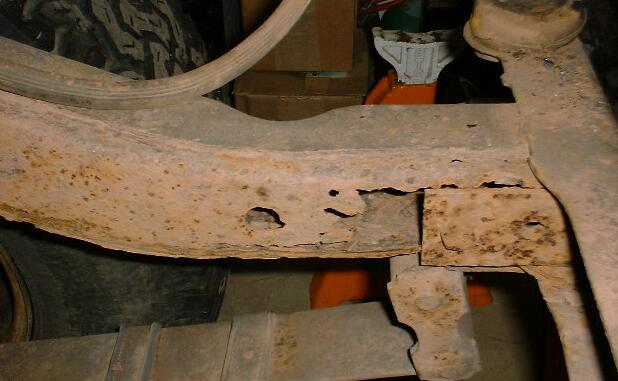
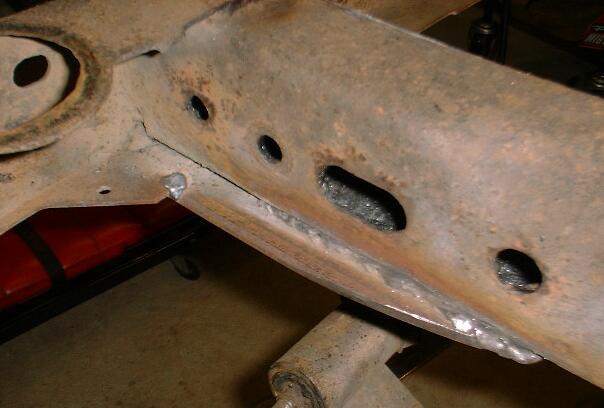
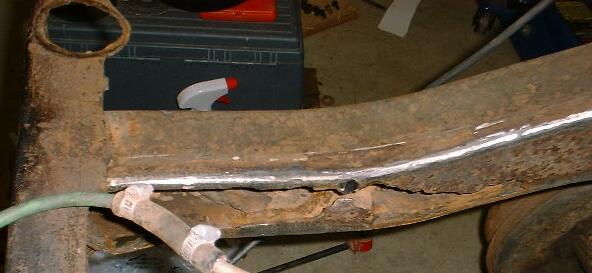
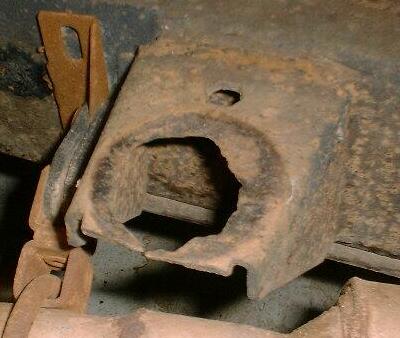
This is the original state of the right rear inner frame rail. Complete rust through in the back, and smaller areas of rust through along the bottom edge.
1979 CJ7 Restoration - Frame Repair
This is the original state of the right rear inner frame rail. Complete
rust through in the back, and smaller areas of rust through along the bottom
edge.
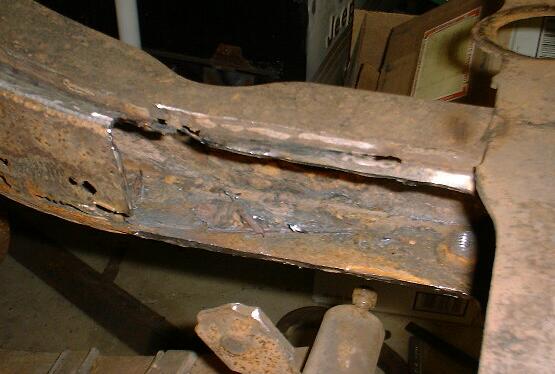
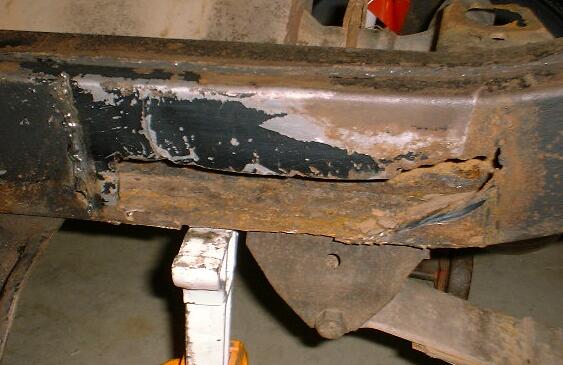
First step was to cut away the major area, so that I could re-plate it.
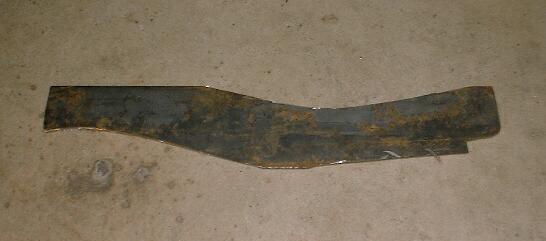
I decided to use a heavy piece of 3"x3" angle iron. Not only
would it replace the cut out section on the inner frame rail, but it was also
give me a new, solid, extra heavy place to mount the shackle hanger on the
bottom of the frame rail.
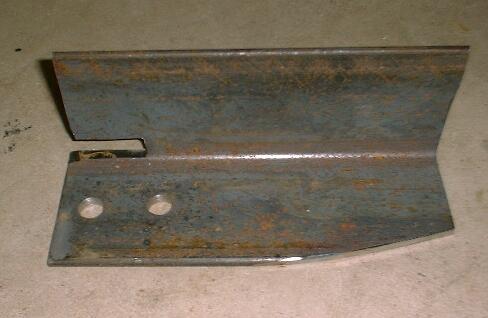
Here's a bottom view of that piece mounted.
I left it wider than the frame on the outside edge, to give extra support to the
shackle hanger, which previously had rested outside the edge of the frame a
little.
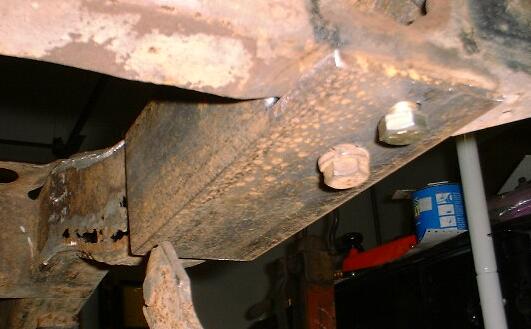
With that angle bracket welded in place, I cut a curved piece of 1/4"
steel, to match the contour of the rear frame rail.
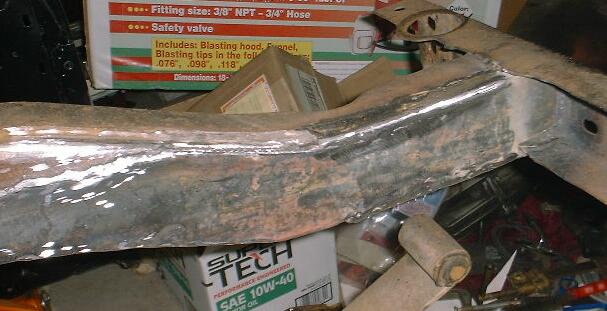
Because I had mounted the angle iron piece flush with the surface of the frame,
I could now install this curved piece on top of the previous repair, to result
in one single, solid, outer surface. Stronger than stock too, since it is
double thick where it had originally rusted through.
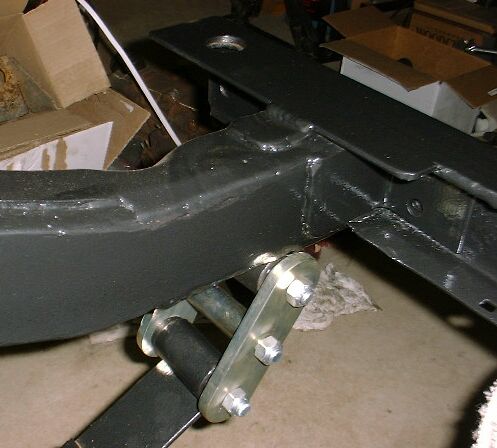
Here it is, after I painted the frame with Hammerite. Quite a difference
in appearance (and certainly strength) from the first picture at the top of this
page. Note the home-made rear crossmember, which capped over the stock
crossmember, and is cut out for the gas tank. The new body mounts were
drilled wider in the new crossmember, to accommodate the wider YJ body
mounts. Also note the angle iron that's welded to the frame, which
provides even more strength for the rear bumper mounts. Shown here with my
new M.O.R.E. greasable 1" lift shackles.
Here's the left side rear frame rail. Pretty much the identical rust
pattern as on the other side, so I'll repeat the same repair method.
There was one other rust hole, on the inside of the right frame rail, just
rearward of the transfer case skid plate.
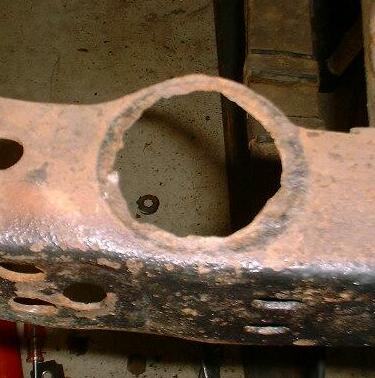
Pretty much all of the body mounting points on the frame were shot. This
is one on the rear crossmember. The new crossmember, pictured earlier,
fixes this permanently.
Here's the one on the crossmember at the front of the gas tank.
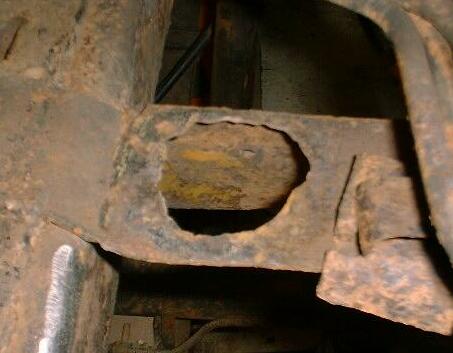
And one of the side mounting points. Apparently, moisture must have gotten
trapped between the body mount bushings and the frame, causing it to rot away.
Two of these mounts needed to be relocated for the YJ tub anyway, so I cut these
off and tossed them out.

Here's my home fabricated replacement mount. It was moved to accomodate
the YJ tub. The frame is painted at this point with Hammerite.
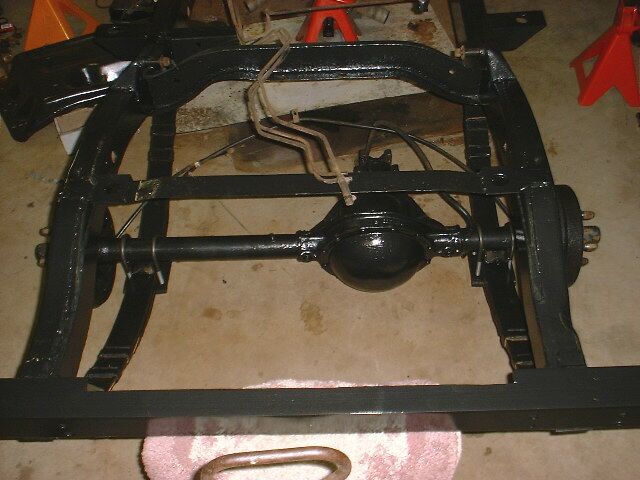
Here's a view of the rear of the frame. New home-made rear crossmember is
somewhat visible (it's notched to clear the gas tank). Also, axle and rear
springs are back into position, after being removed to work on the frame, and to
paint them and replace all the spring bushings.